
It’s just about fall! The older kids are heading back to school. If you are looking for crafty activities to do with your baby or toddler, here are a few fun ideas. If you have preschoolers too, be sure to check out these fun end of summer and beginning of fall ideas as well!
With babies and toddlers, doing art is about getting messy, exploring new textures, and working on fine and large motor skills. Oh yeah, it’s also about having fun!
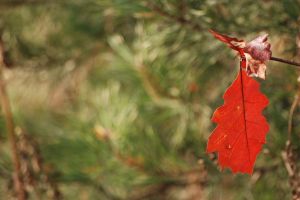
Where I live, the leaves are just beginning to change colors. Go out on a leaf hunt with your baby or toddler. Feel the textures of the fall leaves. Choose a few lovely ones to take home. I find that small maple leaves tend to have an interesting variety of colors on them – everything from green, yellow, orange and red tones on the same leaf. Magnolia leaves can also be stunning in their bright fall colors.
There are many crafts that do not even involve drying the leaves – good for impatient people like me – and toddlers! Make a leaf head band. This works with fresh leaves. Cut out a long strip of paper for the head band. Have your toddler find bits and pieces of natural materials to attach to the head band. When my daughter was one, she was fascinated by cones and rocks. Attach leaves facing upwards like feathers, and attach other natural materials in the middle of the leaves. Wear and enjoy!
You can also use fresh leaves to make a lovely pressed leaf window. The joy in this craft is in finding the leaves and arranging them on the paper. Of course, when the craft is done, your child can look at them for weeks afterwards!
Choose leaves that are on the ground but are not crunchy or curly. Get two sheets of wax paper. Place the leaves on one of the sheets of paper, then place the other sheet on top. Find an iron and an old tea towel, and cover the ironing board with the tea towel. Place the wax paper on top of the rag, and put another piece of cloth on top of the wax paper. This is to prevent the wax from getting on your iron. Iron the wax paper on high, with no steam. As the paper starts to melt and seal, place the iron over the places with leaves on them and ensure that the seal has formed. This will preserve your leaves in a beautiful leaf window for weeks, if not months.
It’s also fun to make nests and animals with leaves. Find acorns or pine cones and use these as the babies. Wrap leaves around them as blankets or skirts. A long batch of pine needles makes a lovely fairy, and a leaf is a perfect skirt. Or build a nest or collect nesting materials for winter animals – place leaves into a basket and talk about animals that are making dens for the winter.
Whatever leaves you choose, bring them home and dry them for a week in the pages of an older book. Use several other books on top to press the leaves.
After you’ve pressed the leaves, you can make pressed leaf gifts for relatives and friends. Once the leaves are dry, glue them onto white paper. Cover the paper with mac tac for a lovely fall placemat. Or place the leaves onto strips of white paper, cover with mac tac, and cut out around the paper. Punch a hole in the top of the strip of paper, and you have a leaf bookmark!
Enjoy the fall leaves with a walk and a leaf hunt this year. What creative ideas do you have to display your treasures?