
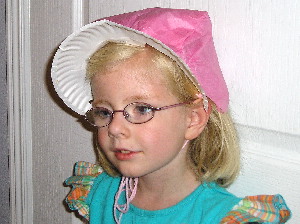
Every little girl likes to play dress up. So give her a chance to dress up like Laura Ingalls from “Little House on the Prairie,” and make a bonnet. Pioneer women wore bonnets to protect their faces from the sun, because at the time it was fashionable to have white skin. Your child can wear it just for fun.
Paper Plate Bonnet
Supplies:
Paper Plate
Tissue Paper
Yarn
Stapler
Hole punch
Markers or crayons
Directions:
Let your child decorate the edge of the paper plate both back and front with markers or crayons.
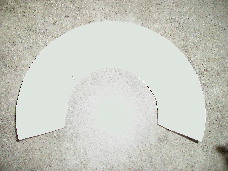
Then cut the paper plate like the picture below to make the bonnet brim. Leave about ½ inch of the flat middle part.
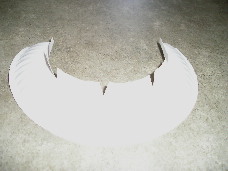
Clip the paper plate in five places to the ruffled edge then fold it back.
Take one piece of tissue paper (15 in x 17 in) and fold it in half, bringing together the shorter sides. Take one corner and fold it in creating a triangle and then fold the other corner the same way. Fit the tissue paper part on your child’s head to make sure it is the right size and then staple the triangles down. The edge with the triangles is the back.
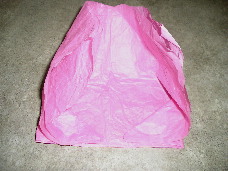
Then staple the edge of the tissue paper that you didn’t fold to the bonnet brim gathering the tissue paper a little. About 1½ inches of the tissue paper will hang off each side of the paper plate.
Punch a hole on each side of the bonnet brim and tie a piece of yarn through the holes. The yarn is used to tie the bonnet onto the head.
Poster board Bonnet
Supplies:
Poster board
Yarn
Hole punch
Markers or crayons
Lace (optional)
Directions:
Print the bonnet template. Take a colored piece of poster board and trace the bonnet pattern onto the poster board, then flip the pattern and trace the other half. The pattern shown is half of the bonnet and should fill up an 8½ x 11 piece of paper. The dotted line is the fold line. You can color or draw a design on the poster board if desired.
Then tie a piece of yarn on each hole labeled “A”. To form the bonnet, tie the two pieces of string together. Their will be a hole in the back. The tighter you pull the yarn the smaller your bonnet and the hole will be.
Then tie a piece of string in the other two holes. These are the strings that tie under your chin. You can glue a piece of lace to the bonnet brim if you want.
Note: This bonnet pattern was originally prepared for the Hoover Library by Joyce Harken in 1996.